About Me

My photo
I'm Alma, I'm the mother to 2 beautiful boys and a gorgeous little girl. I love God, scrapbooking, shoes, sunglasses, purses and shopping.

My Blog List

Weight Loss 2012

  • 8/1/12- 177.3
  • 8/8/12- 175.0

My Pinterest!

Follow Me on Pinterest

Proud Circle Member!

Grab my button!

Blog Hop
Powered by Blogger.

Sunday, December 11, 2011

New Testament cart

I have had my eye on this particular cartridge since it was first released but had absolutely NO luck finding it anywhere! So on Black Friday I asked my husband (who is a Michaels manager) to keep an eye out for one. They didn't get any in but the Joanns did and they were selling theirs for $26! :) yippeee! I was so excited to score one and couldn't wait to make a project (cause you know I just had to absolutely have it!) and it's been 3 weeks and just barely broke it out :/ lol.

A little bit of back story here- I grew up being a P.K. (or for those who don't know, Preacher's Kid). My father was a spanish minister for our local Church of Christ since I was about 5 years old until I turned 17 so I grew up with biblical values and teachings. Now, being the rebellious teen I was, I went down a bad path for a bit until finally growing up and realizing that I needed God and church back in my life (and to also raise my own children). So now my family is back in church, (we are still members of the Church of Christ, that'll never change!) and life is gooood. Have i ever told you guys how blessed I truly am? I might bicker and whine but God always sees us through, we've had a VERY challenging year and now it looks like i'm finishing off the year with what the doctor believes to be a kidney stone but I KNOW that God is in control (I do have to keep reminding myself, i'm only human!). He truly is good and he is LOVE! :)

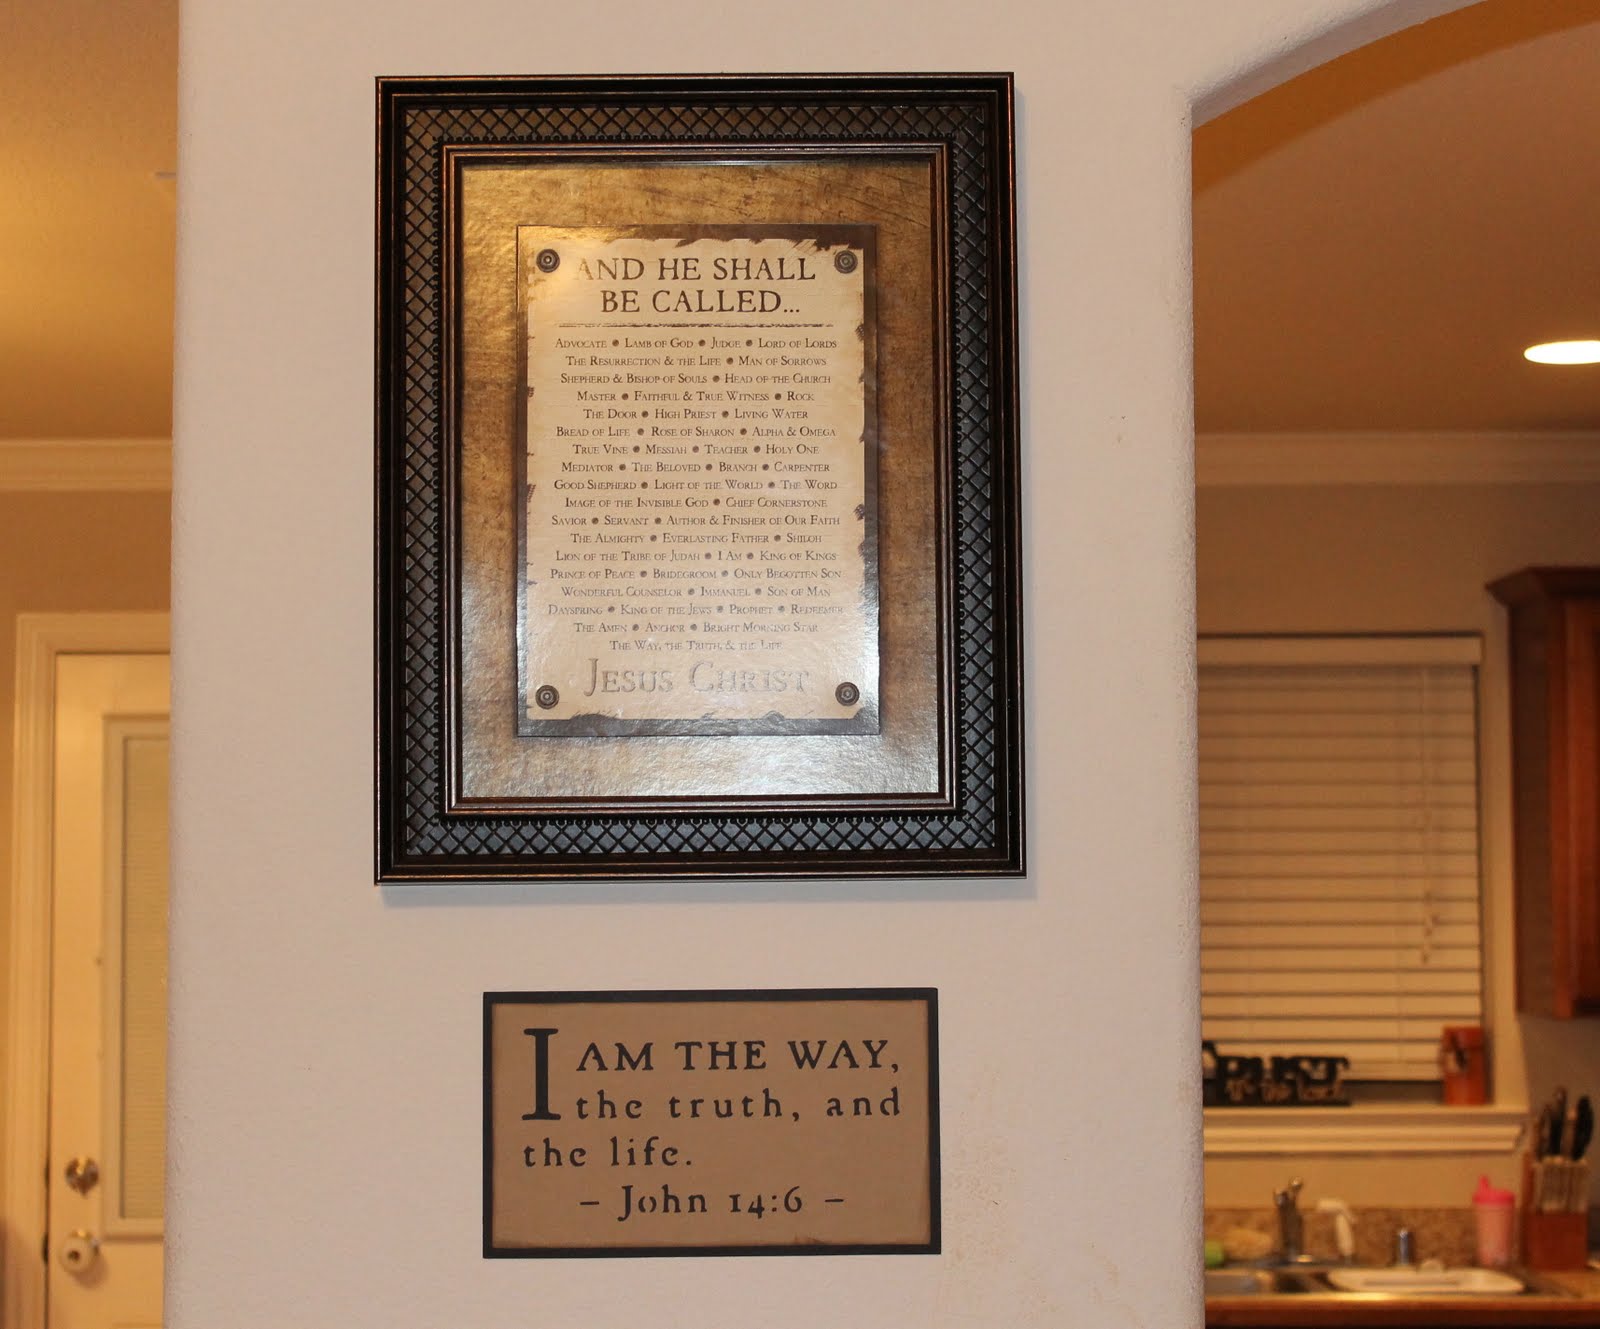
Anyways, so obviously totally not ashamed to proclaim my love of the Lord and if you were to ever walk through my house you will be constantly reminded :) So I thought that cutting out this bible verse on my Cricut Mini would go GREAT under my Jesus Christ wall hanging :)) I love this cart, I cannot wait to cut out more verses and just scatter them throughout my house!


Also, thought I would put some pics of my kiddos anxiously awaiting under the Christmas tree...they are my GREATEST blessings!


Friday, December 2, 2011

Sophie Blog Hop!

Hey guys! Welcome to the Sophie Blog Hop! This hop will feature projects made using the Cricut Circle Exclusive cartridge Sophie. This is the first cartridge of the Circle's second year! All of the bloggers today are Cricut Circle members. Interesting in learning more about the Circle? Click HERE.

If you are starting from my blog make sure you head on over to Michelle over HERE, where the blog hop starts! There is quite a bit of inspiration so make sure you check everyone out :)

First I wanted to share a picture of my little girl, people say she is my mini me :)She loves pink, glitter, Disney Princesses and as you can see, she LOVES the Cricut. (Don't worry, she didn't touch anywhere near the blade!)


I'll be honest with you. I wasn't a fan of this cartridge in the beginning. I'm very "cutesy", I like child like characters mainly because most of my scrapbooking is of my kids and I make the occassional card that is usually intended for children as well (LOTS of nieces and nephews!). But once I really started to look at the booklet, I fell in love with the butterflies and thought this doily backgruond would be perfect for a scrapbook page! Very simple page but you can see that teh design makes it look like some effort was put into it :) The awesome thing about this design is that I was able to use my extra butterflies (the negatives) and offset a few to make it really pop. Did some faux stitching and that's it! :D

**You could also use the extras for a card or something!**


That's me and my honey :) I love him for him, but I also love him because he supports my scrapbooking obsession ;)


Thank you for stopping by! :)) Your next stop is Rexann over HERE!

Wednesday, November 30, 2011

Silhouette Cameo!

Disclaimer- this is MY personal opinion based on day 1 with my Silhouette Cameo.

So all day today I was impatiently waiting for my Silhouette Cameo to arrive. Finally at around 7pm (after hubby came home with my new Mini Van!) =) it came! I was so infatuated with my new car that I didn't start playing with my Cameo until later this evening and boy was I in for a rude awakening.

I'm a Cricut girl. You all know it. I hoard cartridges and machines, so much so that I could barely muster the strength to sell my Pink Expression even though I have an E2, Imagine and Cricut Mini. The Silhouette Cameo is definitely made for those who are not use to Cricut. With Cricut, yes, you are limited to the cartridges but that is what makes it so awesome, it's literally out of the box ready to use. The hardest thing to figure out are the keypad overlay keys. But not with the Cameo. And I thought I was prepared. I am still trying to figure out exact placement on the mat, I almost broke a nail trying to insert the blade housing and I wasted a bunch of paper. (Not good paper, but nevertheless, paper). After finally deciding that the settings the software was telling me was not actually working (the image would cut half way and the rest would just barely scrape the paper) I finally figured out to change the blade depth and it cut beautifully! Granted, I have only tried to cut fonts right now after I changed the blade but it was able to cut a font I've tried to cut on my Cricut using SCAL that I never could. At 1"!

So my opinion? If you are a true beginner (like most of my friends) definitely start with the Cricut. I am pretty computer savvy but if I would have gonethrough what I did 3 years back when I first bought my Cricut, I would have never scrapped again. But if you are up for a challenge, like I am, then this machine has totally endless possibilities. :) I love being able to cut true type fonts from my computer. I know there are other software for it for Cricut but believe me, this thing definitely cuts AMAZING. Like I said, JUST my opinion! :D


Tuesday, November 29, 2011

Birthday Decor

I was so excited last week when I walked into Michaels and saw they still had a few Ribbons and Rosette carts available so I quickly snatched one up! The cashier said that it was the hottest selling cart that day and now I can see why! I'm so obsessed with it! I know how to make rosettes without the Cricut but this is just so freakin adorable :))

Last night I was just looking at my craft space and decided that I had not taken out my E to play for awhile. I was originally going to sell her off but I decided now I just couldn't. It seriously is so hard! So I went old school, pulled out the handbook and overlay and cut out my rosettes at 5". I then used my Mini to cut out the crowns at 2.5" from Life's a Party as the centerpiece. Super easy! This is gonna go great in my banner for Julianne's princess party! :)

This is what I meant going "old school". hahaha :) I love my E!

Tuesday, November 22, 2011

Cricut Mini and 3D Bow

I am so excited! My new Cricut Mini came in today and I can tell you that I absolutely LOVE LOVE LOVE it! :)) It's so cute and small and it cuts perfectly! In the picture, the green patterned paper is REALLY thin and it cut it with no tears :) This is quickly becoming my fave!

So with the HSN bundle, I also got a $25 credit and used some of it to download "3D Bows". This is my first attempt at the single loop bow, so cute and so so so simple :) This mini bag measure 5 1/2 x 4 so perfect for tiny gifts for the holidays and the bow was cut out at 4".

Sunday, November 20, 2011

Life and some Christmas goodies! :)

Hey! Wow, has it been a crazy past few weeks! I don't share a lot of this but I was diagnosed with Generalized Anxiety and depression a few years back and recently had to go back on my medication. The stress of life and this past year have just been a lot and I could feel myself spiraling out of control so off to the doctor I went. Now I don't know about you, but when ever I get anxiety or depression I start to "google" anything and everything that could possibly be wrong with me which leads to an even worse problem which is why I have been away a bit. I believe that all the prayers everyone has made and after talking to some amazing friends on the Cricut message boards have tremendously helped me and i'm so greatful for that! :)

On to the better news- hehehehe =) So last week I don't know if you heard me talk to Jinger on HSN on tv but my sister bought me the Cricut Mini! Thanks sis! It is my early Christmas gift ;) And if that was not enough, DH bought me the Silhouette Cameo as an early Christmas gift too! I'm soooooooooo excited to get to venture onto a new machine and software! Believe me, my Cricuts and cartridges are going nowhere but change is always nice! It says it should be delievered in early December so I can't wait! I'll be sure to show you on here :)

I've had a few people leave me comments on some posts lately and thank you so much! I really do love when you take the time to comment, makes me feel good and def brightens my day! :)

Friday, November 4, 2011

Yudu :)

Hope you all had a great Halloween- I still can't believe that the year is almost up! I for one, can say that I will be opening 2012 with open arms, this year has been really tough on our family but we're still here, together and God is good :)

Now onto my Yudu project- so since I was directed to Ryonet to buy liquid emulsion, OMG. I have become obsessed with my Yudu! I LOVE LOVE LOVE it! I have screen printed sweaters, tee's and a few days ago I bought a 220 Mesh screen so I hope to be able to try my hand at paper screening :) So much fun. I will post about my adventures with the liquid emulsion in a next post. Lets just say I had QUITE a learning curve but you know what? TOTALLY WORTH IT! :)

If you own a Yudu I strongly suggest using your coupons up at Michaels or Joanns, they accept them since it's not a "Cricut" product :)

I screen printed my DD a Michael Jackson sweater (because she's awesome) and yesterday I was at Walmart and saw the cutest silhouette tee. I figured I could make my own and with an even cuter design so I came up with the little elephant. How cute right??

Hope you guys had a great week and holiday :)

Thursday, October 20, 2011

Shadowboxes

I have 3 8x8 shadowboxes that my husband helped me etch with each of our kids names and I hang them up in our living room to showcase them. The object is to rotate them throughout the year and season and so today I decided to change out Bradley's :)


I call this my Cricutless layout because I used a Kid Page kit from Michaels for the stickers (which I RARELY use) and also ribbon from Hobby Lobby. I did use the tab from 'From my Kitchen' but you can make those easily without a Cricut :)

Sunday, October 16, 2011

Cricut Mini-Winner! :)

Thank you guys for being so patient with me while I chose a winner! We had a fun weekend at the lake house with my husband's family and also today was reserved for church and family so I didn't get to choose a winner until tonight! Random.org chose number 39 which was


Yay! I will be emailing you tomorrow to get your info to get your little guy out to you...thanks to all of you who entered! I actually know of a few people who will be doing giveaways of Cricut minis so I will be sure to post some up for you when I hear :)

I know I said I wouldn't be posting up anymore on the mini's but I just had to show you my collection now! I now have 4 distinct colors thanks to some awesome ladies on the mb! I'm happy with 4 because I have all the colors of my machines now! :)


So this week I plan on actually trying to catch up on some scrapbooking- I have to change out the kid's shadowboxes because they are quickly becoming outdated (my oldest son gained about 10 pounds since then!) and get some baby stuff out and mailed (I very much don't like running the errands part of it! lol- I love making the stuff, it's the getting to the post office that gets me!)

Saturday, October 8, 2011

Newest addition to my Cricut family ;)

So most of you know that I got a DSLR Canon Rebel from hubby as an early Xmas gift :) So I found this awesome weekly course over at TwoPeas in a Bucket and I decided to start today cause I'm so tired of having this awesome camera and not knowing how to do anything besides mode! LOL This week they focus on Aperture which is the different focuses you can get. While I didn't want to bore you with a photography how to, figured I'd show you pics of my newest PINK Cricut Mini Collectible who served as my "model" since all my children are asleep ;)


Isn't she sooooo cute?! She arrived today and she was a trade from a wonderful lady on the MB! She wasn't too fond of pink and I was like "OMG! Who doesn't like pink?!" hahahaha...In my world that's impossible! ;) I'm so excited to have her (and to the friend- your purple one is ready to go!) This is the whole reason why I wanted to get at least 1 but ended up with 6! (Out of which 5 were purple!) lol

Wednesday, October 5, 2011

Giveaway! Cricut Mini Collectible- PURPLE :)

Hey guys! So what are the chances that of course I would order 6 Cricut Collectibles and 5 would be purple?? Well, obviously good because that is what happened to me! :/ lol...so I found a home for a lovely one who is in turn giving me their Pink one (yayyyy!) but I'm giving one of these little guys away HERE! :)
Ok, just leave me a comment below telling me you'd like to be entered :) As usual, please be a follower and also if you post to your own blog or Facebook page, let me know and I will enter you in more times accordingly :) I'll leave this open until October 14th at midnight :) Good luck!


Tuesday, October 4, 2011

Baby Steps Card and Scrap storage

I have a good friend back home who just had a little girl and she named her Mia so of course, I had to make her a card :) I used scrap paper to make it, embossed the top half, added some ribbon and used a little girl from Baby Steps. I made the blocks myself and instead of cutting out the small letters, I went ahead and used my Cricut markers to make the letters and spell her name out.I wanted it to look like she was on top of a block but eh. I'm not impressed with this card but I think she'll love it haha :) Simple but cute I believe :)


PS. I wanted to show you my new little Cricut friend, my Imagine Cricut Collectible! I traded with a great person off the messageboard for my blue one (i'm looking really only to have the ones with the machines I have) so I was so excited when she wanted to trade! :) I'm expecting 4 more tomorrow so i'm hoping hoping hoping I get a pink one! :) Like I said, be on the look out for a possible trade post or giveaway ;)


Also- I wanted to show you guys how I finally organized my extra scraps. I had them all in a drawer and I was just not using it and I was wasting SO much paper. So I got a filing cube from Walmart for $1 (in pink!!), added some filing folders, labeled each one and now place each color scrap in it's individual spot. PERFECT!I can't tell you how much paper this has saved me already :D


Friday, September 30, 2011

Pinterest? Follow me!

Hey guys! Do any of you have a Pinterest account? If so, I'm including my link below so you can follow me if you'd like! :) Pinterest is an online virtual "bulletin" board where you can pin any and all stuff from the internet that you want to remember.... believe me, I've become addicted! :) If you need an invitation, let me know :)

Follow Me on Pinterest

Thursday, September 29, 2011

Cricut Mini Collectibles!

Look who showed up at my front door today?? Yup...aren't they adorable?!? I was hoping and praying and crossing everything I had for a pink but the closest I got was that Plum but there is still hope! I ordered 4 more last night so i'm hoping hoping hoping next time I open up a pink one! :) Eithe way, it's fun to open them! They come packagaed up in a cute little box and wrapped in foil so you don't know what color you got until you open :)


**Keep your eyes open for a giveaway soon! I might be giving one of these away!** :)

Saturday, September 24, 2011

Simple Saturday

I'm starting a new "feature" on my blog today and i'm calling it "Simple Saturday". I'm just going to make something extremely simple and call it a day :) I'm battling a VERY sucky cold this weekend plus I have finals due tomorrow so I didn't have any time (or energy) to really work on anything extravagant. I did want to take a few pics of my kiddos with my new camera and just play with it for awhile because the weather was just so gorgeous. I took these pics and printed them out on my HP photo printer. I'm in LOVE! I still can't get over the amazing quality of photos this camera produces and that's just on auto! I can't wait to see what the feature really can do! :)

So the backgroud is cut at 11" (stamp from B is for Boy) and it's adhered to a 12x12 kraft cardstock. The title is cut using George and Basic shape (shadow key) and that's it! I don't think it's that bad considering the fact that my head was super congested when I came up with this!
haha

Friday, September 23, 2011

New Canon Rebel!

Hey guys! So some of you know that I have been dying to get my hands on the Canon Rebel T3 DSLR. I have a Nikon Coolpix but lately it just seemed to really lag and whenever I would try to get a picture of my kids doing something hilarious or quick, by the time my camera took the pic it was 10 seconds too late :(. We came to the agreement that I would save up for it and I was hoping and praying I'd have it in time for Christmas pics. Well, yesterday my sweetie came home from getting the tires on his truck changed and rotated (I've been battling a cold for the last few days so he went alone) and he brought me MY CAMERA!! Woohoo!! <3 I'm so blessed to be married to him. He always does his best to make me happy :)

So I have been reading up on it and frankly, I'm a little intimidated. I have quite a few friends who are really into photography and lets be honest, I don't really need another hobby. But This is an investment that we feel is worth every single penny because the pictures are amazing! Our son Bradley is low functioning autistic and he NEVER looks at the camera. Yesterday I took him outside to play and capture some shots and I got the most amazing picture I've ever gotten of him. So any doubt I might have had was erased just by this single picture.


*BTW- isn't he a little cutie pie? I'm a little biased but this is my little angel. Jacob and Julianne do their own thing most of the time but this little one likes to just come up to us and cuddle. :))**


I just wanted to share my excitement with you guys and hopefully now with my new camera, I'll be way more inspired to get back to my scrapbooking :) I have about 2 mini albums i'm working on that I will post sometime this weekend. I am battling a cold AND have finals on Sunday and since my hubby is working all weekend, it's just me and the kids. :)

Happy Fall!!

Saturday, September 17, 2011

Personalized tote bag

Without getting into any "politics" I just wanna say...I LOVE LOVE LOVE Sure Cuts A Lot 2.0 lololol let me tell you why. When I was trying to design this simple tote bag I just wasn't happy with any of my font carts. Don't get me wrong, I love my cartridges but I just wasn't feeling any of them. So then I remembered that I had SCAL and thought, well I'm sure I will find a font on my computer that I love and I did!

I used a regular blank canvas tote bag from Michaels, and of course ran it through my YuDu (using the Vinyl technique). I then added a $1 butterfly rhinestone iron on and some Pearl Pen pearls and of course, made a bow using my Bowdabra. Can I tell you how much I LOVE that thing?! OMG, I want to make bows for everything! LOL

This isn't the actual gift itself, this is the "gift bag" but the way I see it, she will be getting two gifts in one because she can reuse this bag :)

Friday, September 9, 2011

Simple Scrapbook Layout

So I had a WHOLE elaborate layout planned for these pictures but have you ever had one of those nights where NOTHING you cut on your Cricut is panning out? I tried to use my Expression "old school" (haha, with the cartridge and keypad) and I have gotten so use to my Gypsy that I was lost, ended up wasting some paper. Then I tried CCR and it would not read my machines, finally got it to read my Imagine only for the mat to keep spitting out. :/ THEN I went to design on my Gypsy using the Elegant Edges cartridge only to remember that my cartridge wouldn't link to my G! So needless to say, this was the best I could come up with on a "short" notice. LOL

Aren't these pics cute? We took my daughter to the American Girl store for her first trip and she LOVED it! I was giddy to watch her because I had an AG doll as a little girl and I always envisioned my own having one. Well, daddy bought her her first Bitty Baby that day and she's been playing "mommy" ever since. :)


Have a great weekend!

Thursday, September 1, 2011

Happy Birthday Matey!

Hey guys! Well today is a very special day because my hubby turns 40! :D I don't know about you all, but I struggle with cards, ESPECIALLY cards for guys but I received my Buccaneer Imagine cartridge yesterday and knew I just had to use it so this is what I came up with. Another reason why I love the Imagine so much, I was just not in the mood to cut out a bunch of little pieces today so all I hit was print and cut :) I added a little bit of white and brown Twine and voila, that's it :)

The card is on a white card base that measures 6.5x5 and everything else is 1/4" from that. The pirate is cut at 4" and the Happy Birthday at 3".

**Sorry for the unedited picture. I am still learning my Macbook and haven't quite gotten the editing part down**


Saturday, August 27, 2011

I YuDu? Du Yu?

Hahahahaha...that's so funny LOL. My hubby was able to find me a YuDu for $99 at his store (after having 5 different stores in the Dallas area tell me they didn't have any!) so I got to play with it today. I.LOVE.LOVE.LOVE. it!! I know a lot of people get so frustrated with this machine but it's so simple to me! I guess you just have to really take the time to read the intrusctions and also to watch YouTube videos because that is what helped me :)

My son is having his 7th bday party next Saturday and he wants it Spongebob theme so I thought I would make him and his brother and sister some shirts! I printed out the Spongebob from a coloring page I found and then burned the image to the screen! I would go through all the steps here but i'm soooooo tired after dragging 3 kids to all my errands today! Haha

Enjoy the shirts!


Monday, August 22, 2011

First VLOG!

Hey guys! :) So I thought today I would post my first ever VLOG. I have always wanted to actually "talk" to you guys and then I discovered the webcam on my laptop! LOL. Sorry the quality is not all that great, I hope to be upgrading to a Macbook in the next few weeks but for now, this will do! :) Also PLEASE excuse my hair and the fact that i'm not wearing any makeup. I did this quick video right after I put my daughter down for a nap and I worked out so it's not my best look. LOL

Really quick, this video is just an opening for what I will be doing from now on. I started the Body by Vi challenge last Thursday and wanted to show all of you my progress as I go throughout the weeks and also, show you guys some scrapbook layouts I have made while MIA.

Don't forget to become a subscriber to my YouTube channel to get more updates on my Vlogs. I will do my updates over there and try to keep this blog crafty only :)

**If you wanna jump ahead to the "Cricut" talk, it's about minuter 5:00. :)**

Monday, August 15, 2011

Magical Memories layout

So awhile back I learned a cute little trick for "designing" your own pattern paper on the Imagine. I can't remember who exactly came up with this concept but it originated when the Cricut Everyday cart came out and people wanted "Cricut Circle" paper. Someone got to work and figured out that if you autofill an image to any size paper, voila, you can make your own pattern paper. EASY! And if you want every other color changed, all you have to do is make the first image on color, and add the same second image with a different color THEN press autofill and there you go. :)

So today after dealing with a VERY cranky 19 month old (she's teething) and my husband being away for training I finally sat down to make an 8x8 page for my son Jacob's Shadowbox. I have 3 shadowboxes that Chris (my husband) helped me etch with each of our kid's names and I just add a scrapbook layout to them. So I try to periodically change them the older they get, or by season, whatever but after the headaches I have dealt with this past week I just was not in the mood to make something extravagant. I cut down a red 8x8 piece of cardstock, black 7.75x7.75 and my pattern paper at 7.5x7.5. Then I made a little border, added some acrylic "buttons" and of course, for the title used Emma's Fun in the Sun stamp set. :) Simple and now I can go back and finish watching my all time fave show, 48 hours. =)


Friday, August 12, 2011

Teresa Collins Scrapbook Layout

Hey guys! Sorry i've been MIA for the past week! I've been super busy moving my scrapbook area over to my dining area (more room PLUS now I can scrap all night since I wont be waking everyone in my bedroom up!) and just busy with my 3 kiddos. I'm so excited for them to be going back to school, I LOVE my kids but it's time they go back to learning! :D

As many of you know, I recently began teaching myself how to sew with a pillowcase dress in mind so the pictures of my daughter in this layout are of her modeling her dress made by yours truly. ;) I also had to make her American Girl doll, Kit, her own dress to match them up. Let's just say that this was a hit! (Oh and thanks to my sis (my kid's call her TIA) for gifting Kit to Julianne!)

This scrapbook layout was made using the Teresa Collins Sophisticated cartridge and Baby Boutique Imagine cart. Have I told you guys how obsessed I am with them?! Now you know ;)

Directions:
12x12 White cardstock
11 3/4x 11 3/4 black cardstock
11x11 pink cardstock

8 1/2 x 11 black cardstock
8 1/4 x 10 3/4 pattern cardstock

Border:
12x12 black cardstock
2x11 3/4 pattern cardstock

Pictures were matted according to their individual size but usually I mat them at 4 1/4 x 6 1/4 :)

Cuts from:
Beautiful- Sophisticated 2.75"
Crown- Baby Boutique 3"
Journaling square- Baby Boutique 3"

Then faux stitched around pink cardstock and added some Viva Decor pearl dimensions to crown and popped everything up with pop dots. :D


This is a close up of the crown that I cut from Baby Boutique. I added the "pearls" using my Viva Decor pens to give it some dimension. Isn't it adorable?!


Hope you guys have an amazing weekend! My hubby is off to a week long training trip so I'll be on FULL TIME mommy/daddy watch next week! Wish me luckkkkk!

Tuesday, August 2, 2011

Layout and first Pillowcase dress

So this past week I have gone back and forth between doing scrapbook layouts and also teaching myself how to read patterns and work on my stitching so really quick I wanted to show you guys what I made!

The layout is CRICUTLESS (I know, shocker!)but it is scraplifted from a post Teresa Collins made on her blog. (I don't know if she came up with this layout or if she had a guest designer, either way, THANKS for the inspiration!). I used thickers for my title and cut out the butterfly from the same paperpack (that wasn't actually scraplifted though!) The flowers are actually fabric flowers with some gems in the middle and that was it! So easy :)

**Please excuse the horrible picture angle. My camera is out of battery so I had to use my FLIP.**


I have been working my way up to trying to make a dress for my daughter so yesterday I finally ordered a pattern from the Crafty Gemini for a pillowcase dress and got to work! I made a blue and brown dress and it came out awesome but I definitely learned A LOT! Practice definitely makes perfect when it comes to sewing! ;) So after using cheapy Walmart material I finally went to Hobby Lobby and bought some beautiful fabric that reminded me of Teresa Collin's Sophisticated cartridge in my favorite color combo, pink and black! Doesn't it match my scrapbook layout?! :D


Have a great week :D

Thursday, July 28, 2011

Best Friends Layout- TC Posh collection

So I ordered the Teresa Collins Posh Collections with one thing in mind, making my 12x12 shadowbox of a scrapbook layout of my best friend and I throughout the years. My best friend Cynthia and I have been friends since we were 2 years old and we hadn't seen each other since 2004 so when I went back last week she and I got to reunite and let me tell you, it was SO awesome. There is nothing in life like having that good girlfriend, that one true best friend so I'm very blessed that I've had one for the past 23 of 25 years of my life so far.

The pictures are of us throughout the years. The top left one we were about 2 years old swimming in her old swimming pool, the middle one we were at a Backstreet Boys concert in 8th grade (13 years old) with our sisters and the bottom one is one of us from last week as adults!


Did I tell you how much I LOVE the TC Posh collection?!? OMG! It was like it was meant just for me! The papers, the colors, the die cuts, PERFECT. This is a 12x12 layout with a fabric flower that I learned from Vanessa over at the Crafty Gemini. (She is AWESOME with sewing tutorials! I absolutely LOVE her channel!Check her out! Fabric Flower Tutorial


The title was cut out from Storybook using the shadow and regular function keys at 2 1/4". The pink glitter paper is also from the TC collection and cut perfectly with my E2. :)


That's it! When I hang it up I will update with more pics :) Have a great Thursday!

Thursday, July 14, 2011

Winner!

Good morning everyone! I'm SO sorry I have been late in posting up the blog hop winner! It's been a crazy hectic week trying to get my son and I ready for our California trip tomorrow! Really quick, here is our winner:

JennyPlace2! Congrats! Please email me at msalmabrooks@yahoo.com with your info so I can send that out to you as soon as I get back! I will be in California from Friday- the 23rd but it will be in the mail as soon as I arrive ;) Thanks everyone for playing along!

*Also- for the next week I will most likely not be posting so have a great week!**

Saturday, July 9, 2011

Pinkalicious Birthday Blog Hop

Hi everyone and welcome to the Pinkalicious Birthday Blog Hop!If you came over from Princess Paper Projects then you are in the right place! If not, you can start over at Melissa's blog at Adventures in Heels First off, I want to wish Melissa a VERY HAPPY BIRTHDAY! She is the one we are celebrating! :) The theme is to use her favorite colors: pink, black and white (which coincidentally happen to be mine as well!;). Now, I have had a crazy crazy busy week since my sister was in town this past week so I want to show case a birthday card I have made tying these colors in! Hope you enjoy!

I made this card for my husband's cousin's daughter when she turned a year old, I love cupcakes (duh!) and of course, pink and black glitter :) The cupcake was cut from the Better Together Imagine cartridge and I used French Manor for the stamped background which was welded on my gypsy. This image is also found in a few other carts. If you need help looking, check out My Cut Search This website will show you where any image on any cartridge is at. I LOVE IT!


**Giveaway**

Not only do you have the wonderful giveaway from the sponsor of this blog, but leave me a comment on this post and I will enter you into my own giveaway which is the Cricut Cake Birthday Cartridge! I will leave this open until Sunday night 7/10 midnight, winner will be chosen by random.org. and you must be a follower to win! GOOD LUCK!! :)

**The giveaway for the actual cart is open to US residents only BUT if you win and you are from out of the country I will send you a $10 Michaels gift card**

Next up is Yellow Bird Creations, she has a FABULOUS project lined up! :)

Wednesday, July 6, 2011

Recycled T-Shirt (Sewing)

I don't know about you but in my house, we have A LOT of old t shirts just lying around. It doesn't help that my dad is obsessed with skulls and anything "rock" so we have a lot of BLACK tees. LOL. So I was rearranging my bedroom today and decided that I would clean out some of my closet and I found all these skull t shirts that were given to me by my dad. Now, I LOVE skulls and punk fashion as much as the next person but those are mostly my dad's style so I figured I'd recycle them into something. I then went on pinterest and saw that someone had posted a tutorial on how to recycle tshirts and make them into shopping bags (or really any kind of bag you need!). The shirt I used was an extra large (THANKS DAD! :/) so it makes a big bag but you could always use smaller shirts to get smaller bags :) If you are interested i'm going to give you the link to the video on how to do it. I'm by NO MEANS a sewing expert (heck, i'm still in the beginning stages) so it's better you learn from someone who knows what they are talking about. lol

Tshirt bag tutorial


Now, I hemmed (is that the proper word?) the edges to give it a cleaner look but in the tutorial she just leaves it. I was afraid it might fray or unravel so I pinned it and finished it. How cute will these be in pink or any other kind of girly design? I'm thinking I need to bust out my iRock and bling this baby up! :)

Friday, July 1, 2011

Imagine VS Expression- Mickey Mouse and RGB Code book

I have been meaning to do this for a LONG time but I'm actually participating at Crazy about Cricut's blog on Monday to showcase how to help you put together some Disney characters and I thought I would should you a sneak peek here!

So, both of the Mickeys are cut out at 4" except the one on the right is cut from my pink Expression and the one on the left is from my Imagine using just white cardstock! (I printed and cut, including the black base). I will list settings towards the bottom of the post so you can kind of get an idea what worked for me. Obviously, I believe the Imagine Mickey came out way better than the Expression but here are some tips I have learned:

1) CARDSTOCK MATTERS! It truly does! I tried cutting Disney characters with some of the Hobby Lobby 8 1/2 x11 pack and it would just rip. I suggest using a heavier cardstock so the cuts come out nicer.

2) Play with your pressure and speed. A lot of times you will get a completely different cut just from changing your pressure and/or speed. And don't be afraid to use multicut if you see that you need to lower your pressure.

3) Don't cut Disney characters smaller than 4". And even that is pushing it. Depending on how many layers, the rule of thumb for me is that the more layers, the bigger the size needs to be. Besides, on scrapbook layouts bigger cuts will match great!

4) Do what I did and make yourself an RGB code book to keep near your Imagine. LIFESAVER!!!! The Imagine Mickey is true to color as oppose to the Expression where I just used cardstock I had on hand and the Imagine truly made it soooooooo much easier to cut. It didn't move or rip on me once. I <3 my I!


IMAGINE


Expression


Expression settings
**Settings for black base, face and eyes and shoes)
Blade 5
Pressure 4
Speed 4

Shorts
Speed 3
Pressure 3
blade 6
multi cut 2x

Imagine Settings:
Speed 4
Pressure 4
Blade 6

**RGB CODE BOOK**

Seriously a LIFESAVER and A MUST if you are an Imagine owner. I wanted to make a book to keep near my Imagine so I don't have to constantly look up RGB codes so this is what I came up with.

I took a 8 1/2 x 11 Your Story binder and printed out PDF files of RGB codes from Scrapmaster Paradise pdf files. I printed them out and bound them to my book. EASY. I now have them next to my I and it came in handy for when I printed and cut my Mickey Mouse. :) The cover is from Elegant Edges and the font is from Sesame Street.

Thursday, June 30, 2011

Recipe book!

Welcome back Imagine! Fed Ex (love those guys!) delivered my replacement this morning! :) My poor 7th child (I've got my 3 biological ones then it's my machines ;) anyways, my Imagine had to be replaced because when I went to do an update, it completely wiped the hardware off! :( So needless to say, my machine at the moment is not pink but the hubby will be taking care of that when he gets home tonight! ;)

So since I have been on this sewing kick for the past week, I decided to put it up for a bit to play with my I and I didn't realize how much I had missed it! The Imagine has always been my 2nd favorite machine (with the Expression still being number 1) but I don't use it as often as I should but now that's gonna change!

So for my project today I decided to use my Your Story 4x6 binder, Your Story Photo and of course my Imagine to make a quick and simple recipe book. I LOVE recipe books (this is my 2nd one I've made) but the last one was for baking. I figured I would dust off my Kate's Kitchen Imagine Art cartridge (i've never used it!) and figure something out. I LOVE it! The art cartridge comes with a bonus "Recipe card" feature so all I had to do was size it to 4" and print and cut the recipe card! Then I inserted my From My Kitchen cartridge and cut out the index cards to seperate the different categories and flood filled it with the same pattern from Kate's Kitchen. Tied a bit of twine around the book cover and added some left over pattern and a picture of a mixing bowl and that was it! Cute riiiight? I forgot to mention that I bound it with my small Your Story. All of the stores around my area have been clearancing out all the Your Story binders so i'm HOPING that I can find some more 4x6 cause I love them! :)

**Oh and now i'm going to give my mother in law my recipe book and hope she fills it up with recipes for me!**


Have a great day!!

Tuesday, June 28, 2011

Sewing!

Uh oh! I have found a new hobby! LOL...SEWING!! :) I bought myself a sewing machine this weekend that i've had my eye on and I haven't turned back! I have managed to make my daughter a small nursery blanket, my son a Lightning McQueen blanket, some shorts made out of a t-shirt for my son Bradley (WITH elastic!) and a tutu for Julianne! PHEEEW! And I just started on Saturday night! :) Who knew that there was so much stuff you could make yourself?? My next goal is curtains but for today, I think i'm gonna make myself a small drawstring bag. I'm going to Disneyland in 2 weeks and I need a small bag to carry some of my stuff. I don't have anything "scrapbook" related today, but I wanted to show you my new "Sewing" projects! :D