About Me

My photo
I'm Alma, I'm the mother to 2 beautiful boys and a gorgeous little girl. I love God, scrapbooking, shoes, sunglasses, purses and shopping.

My Blog List

Weight Loss 2012

  • 8/1/12- 177.3
  • 8/8/12- 175.0

My Pinterest!

Follow Me on Pinterest

Proud Circle Member!

Grab my button!

Blog Hop
Powered by Blogger.

Saturday, April 28, 2012

Silhouette Cameo- Doll box

So I am attending a baby shower tomorrow and thought this was the PERFECT opportunity to try out this doll box I have had my eye on forever! I bought the file from the Silhouette Online store and then cut acetate for the "oval" window. I just took the window cut and "offset" it so that it would be larger than the cut and I could glue it down :) Isn't it adorable? The box measures roughly around 7" tall and 4" wide. It really is such a cute box :)I also cut the tag on my Cameo as well and that is around 1".
Have a great weekend! :)

Friday, April 27, 2012

Cricut 3D Bows tutorial

A few weeks back I got a few requests from some of my friends to make a tutorial on how to put together the 3D bows that you can get digitally from Cricut Craft Room. I finally got some time and was able to shoot a quick tutorial so I hope that this helps you. These are the gift bows that I used for my Easter baskets. Hopefully this helps you, just click on the link below the picture to take you to the video :)
3D Bow tutorial

Monday, April 16, 2012

Quick Minnie Mouse wall art

Omg.. Now I can blog from my phone! Lol well I just wanted to post a quick Minnie Mouse cut out I made for Julie's bedroom. Like most of you know, Julie is a HUGE Mickey and Minnie Mouse fan So this was definitely fitting :) I cut Minnie using the Mickey and Friends cart at 11 1/2.. These characters are so much easier to work with at much larger sizes :)

Please excuse the Instagram pic :) I accidentally deleted it off my phone so had to find it somewhere :)

She loved it so much that she has asked for Daisy :)

Wednesday, April 11, 2012

Transfering CCR files to Gypsy

Hey guys! Well today I wanted to share a quick tip I just learned. I'm sure a lot of you already know this but I wanted to just make sure ;)

I LOVE designing on Cricut Craft Room but dislike having to connect my laptop to my machines. Call me lazy ;) So I wanted to find a way to design on CCR and then transfer my files to my Gypsy and then just lug my Gypsy. That way I design on a much bigger screen and only carry something small around :)

To do this is really simple.

1) Open CCR and design away :)
2)Once finished designing, click on SAVE (just to be sure)
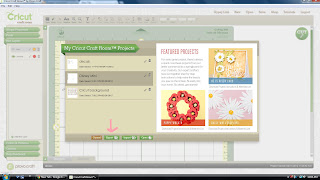
3)Click on Open
4)Click on the project you choose and click EXPORT.

5)Click on GYPSY

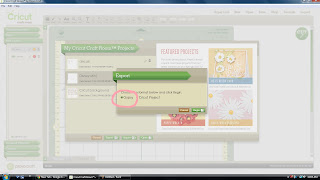
6)Click on Begin and it will say 'Finished exporting- save to your computer'

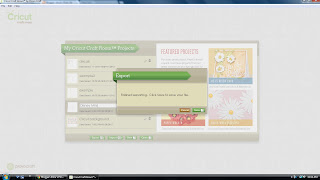
7)Then name it and save it onto a file in your computer. I like to save mine to Downloads so I remember where it's at.
8)Once it's saved, you will connect your Gypsy to Cricut Sync and then on the projects tab all you have to do is click 'Add project', locate your file and DONE! :)

**Very important** Remember to CLOSE Cricut Craft Room before you attempt to load file to your Gypsy because it will crash and wont allow you to continue. :)

Hope this helps you! Happy Crafting!

Saturday, April 7, 2012

Happy Easter!

I hope you all have a GREAT Easter! While we like to remember what this holiday truly means, it doesn't mean that the Easter bunny doesn't make a quick stop :)

This year I was going to go the lazy way and just buy a pre-packaged basket but was heavily influenced by my FB friends to just get creative instead :) I put their baskets together but I used the Cricut Craft Room 3D Bows and made my own bows.It gave me a great excuse to bust out my Cricut for a bit! :)


Happy Easter!

Wednesday, April 4, 2012

Brag book

So, my mother and I have had a VERY rocky relationship and for the better part of the past 3 years, have barely spoken. Well, this weekend she reached out to me and today we are going to go have lunch and i'm SO very excited. Very, very nervous but excited. So since she hasn't been around much, I thought I would make her a very quick and easy brag book to give her with pictures of my children. When I talked to her this morning she was very excited :)

I took a 4x6 pink Your Story photo cover and added a black piece of cardstock that I embossed with my favorite folder ever, polka dots. :) I then cut out a heart at 2 1/2" from Plantin Schoolbook, added glitter to it using my 2.5" Xyron sticker maker (if you are interested in how I do that, let me know and I can give instructions!), added some toole and some 'bling' and my cover was ready :) I then cut out 7 pieces of 4x6 cardstock for a heavy base for my photos, ran my photos through my NEW Creatopia (LOVE LOVE LOVE IT!) and mounted them. I then used my YS Photo to bind it and done! Not super elaborate but so quick and easy :)


Tuesday, April 3, 2012

Tornados and...CREATOPIA!

First of all, thank you to all of you who prayed for our family during the tornados and storms that just swept through Dallas and surrounding areas. Our family and property is safe but continue to pray for those who were affected. As a native Californian, I can never get use to the tornados and it scares me but God is in control! :)

Well, before the bad weather our UPS man dropped off my new toy..the Xyron Creatopia! I am SO excited for this, it can make anything up to 12" into a sticker PLUS it can do embossing up to 12", laminate and magnets oh and die cuts. The best part though is that is cost me a whoppin' $59! This machine is at least $120 at Michaels plus it came with a tote bag for it. So excited, just wanted to share. This baby is HUGE. Like about the length of my Cricut Expression :)